How To: Verified Dating Profiles using Bloom

People have been experiencing issues with verifying the identity of potential matches while dating for hundreds of years. Classified ads in newspapers made that worse, and online dating has made it nearly impossible for you to know if the person that just messaged you is, in fact, the person of your dreams, someone trying to scam you, or even someone who poses a potential danger in real life.
Lots of solutions have been tried and tested to resolve this problem, but none have stuck. Whether you were on Lavalife in the 90s, Match.com or Plenty of Fish in the early 2000s, or are using Tinder or Bumble today, you may always have that sneaking suspicion about who’s really behind the keyboard until one of you gets the courage to ask for a video call or to meet up in person.
BloomID can help solve all of that. With Verifiable Credentials, like email address, phone number, ID document (with facial matching), social media accounts and more, adding Bloom’s technology to a dating app can significantly reduce the number of people getting fooled and, therefore, souring on your product and the experience. This can have a snowball effect, especially on a smaller platform. Authentic identity makes for authentic connections.
Today, Match.com provides ID verification for paid users, and checks that ID against a variety of databases to ensure the individual is not a criminal. However, Match Group does not implement this security feature across any of their free platforms, including Plenty of Fish, Tinder, Meetic, Pairs, OkCupid, and others. It readily admits registered offenders are using its free products.
We didn’t come across any other dating platforms that allow you to verify an identity, including platforms targeted at seniors and retirees, therefore putting individuals at risk of being scammed, assaulted, or worse (see statistics 23-27).
This problem can be seen as a tradeoff between bringing in a high number of users to your platform versus fewer people using a paid platform, although the latter would introduce more inherent trust. What you can do, instead, is introduce a middle-path: allow people to bring their reusable Verified Credentials to your dating platform to enable verified profiles, and have people self-select whether they want to focus on chatting with people with verified identities or not.
Let’s see how you can implement BloomID in your app!
Let’s Start Server Side
Let’s assume you have a back end that can handle some JavaScript in the form of Node.js, or that can be passed a payload from said Node.js library.
To that end, we’re going to implement Verify Kit so that we can verify someone’s name on their profile is, in fact, the name on their photo ID that they have already verified. Verify Kit makes it simple to go from an http payload to a verified identity document in just a few steps.
We’re going to install Verify Kit using this command:
npm install --save @bloomprotocol/verify-kit
Use the validateUntypedResponseData function from verify-kit, which returns an object with a kind property with potential values of 'invalid' or 'validated'. Assuming a 'validated' payload, the object will contain a data property structured as a verifiable presentation.
Next, given a verifiable presentation, we extract the id-document from its verifiableCredential property and parse the JSON payload to receive the raw identity document data, which is structured like this:
export interface IBaseAttIDDocData extends IBaseAttDataObj {
    date: TDateOrTime;
    name?: TPersonalName;
    country?: string;
    document_type?: string;
    authentication_result?: 'unknown' | 'passed' | 'failed' | 'skipped' | 'caution' | 'attention';
    biographic?: {
        age?: number;
        dob?: TDateOrTime;
        expiration_date?: TDateOrTime;
        name?: TPersonalName;
        gender?: string;
    };
    classification?: {
        classification_method?: 'automatic' | 'manual';
        id_type_name?: string;
        id_class?: TDocumentClass;
        id_class_name?: string;
        country_code?: string;
        issue_date?: TDate;
        issuer_name?: string;
        issue_type?: string;
        '@provider_specific'?: {
            issuer_code?: string;
            keesing_code?: string;
            generic?: boolean;
        };
    };
    facematch_result?: {
        is_match?: boolean;
        score?: number;
        transaction_id?: string;
    };
    images?: {
        front?: string;
        back?: string;
        selfie?: string;
    };
}
The most important properties of an identity document are the authentication_result and facematch_result. Any value in authentication_result that is not 'passed' requires manual review to verify the authenticity of the document.
Instead of starting from scratch, you can use the server side code from bloom-starter-kyc as a way to kickstart your integration efforts!
Once you have all that in place, you’re ready to accept data from Share Kit!
Let’s Head Client Side
Share Kit is the front end library needed to generate a data sharing request.
Let’s assume you are building an Android app. You can find the Java Share Kit library here in Bloom’s GitHub account.
For this demonstration, let’s keep it simple by requesting the ‘id-document’ and ‘facebook’ verifications since you can extract ‘full-name’ from both and, with your own code that we will leave you to write in the language of your choice, compare the two server side!
Building the Android Library
- Open the ShareKit project in Android Studio and let the project sync with gradle.
- When the project is ready, click on the Build menu and then select Clean Project i.e. Build -> Clean Project, in Android Studio.
- Then also click on the Build menu and then select Rebuild Project i.e. Build -> Rebuild Project, in Android Studio.
- Finally navigate to the ShareKit directory and open the folders app -> build -> outputs -> aar and copy the app-debug.aar library file generated. Paste this file anywhere in your filesystem and preferably rename it to sharekit.aar
Android Installation
Make sure your Android project has a minSdkVersion of 16 or greater, otherwise adding the library will cause your project to fail to build.
Add the sharekit.aar library generate above by doing the following in your Android Studio project:
- Click File -> New -> New Module.
- Click Import .JAR/.AAR Package then click Next.
- Enter the location of the compiled sharekit.aar file then click Finish.
- Then make sure the sharekit library is added in your settings.gradle file i.e. include ':app', ':sharekit'
- In your projects build.gradle file add a new line for the sharekit lib in the dependencies block i.e. dependencies { implementation project(":sharekit") }
- Finally click on Sync Project with Gradle Files for your project to sync with the sharekit library.
If the above steps are done successfully then you should be able to clean and Rebuild your project successfully as specified above i.e. Build -> Clean Project & Build -> Rebuild Project
Usage
To use RequestButton in your project, do the following:
- Import the ShareKit class into your Activity/Fragment i.e. import com.bloom.sharekit.ShareKit;
- Then initialize the RequestButton, set the share-kit request data & callback-url and add it to your layout view programmatically like this:
@Override
    protected void onCreate(Bundle savedInstanceState) {
        super.onCreate(savedInstanceState);
        setContentView(R.layout.activity_main);

        LinearLayout layout = findViewById(R.id.example_activity);

        // initialize the request data JSON Object and the types array
        JSONObject requestData = new JSONObject();
        JSONArray attestationTypes = new JSONArray();
        try {
            requestData.put("action", ShareKit.attestation);
            requestData.put("token", "3b922185-68c6-4e83-9b79-30e0b5fbf873");
            requestData.put("url", "receive.datingapp.co/api/receive");
            requestData.put("org_logo_url", "https://commcomm.xyz/bloom/DatingApp-Logo.png");
            requestData.put("org_name", "DatingApp");
            requestData.put("org_usage_policy_url", "https://datingapp.co/legal/terms");
            requestData.put("org_privacy_policy_url", "https://datingapp.co/legal/privacy");

            // add the attestations
            attestationTypes.put("id-document");
            attestationTypes.put("facebook");
            requestData.put("types", attestationTypes);
        } catch (JSONException e) {
            e.printStackTrace();
        }

        // this is the callback-url/deep link for your app which will be used by the bloom app to re-direct you to your after the request is handled
        String callbackUrl = "https://datingapp.co?token=3b922185-68c6-4e83-9b79-30e0b5fbf873";

        // initialize the button by passsing the activity, bloom requestData and your app's callback-url
        Button bloomButton = new ShareKit().RequestButton(this, requestData, callbackUrl);

        //add button to the layout
        layout.addView(bloomButton);

        // set the button padding if necessary
        layout.setPadding(30,50,10,10);
    }
That token above is unique to your app. It is not a token provided by Bloom. You choose your own as it’s a unique identifier for your app, allowing you to distinguish data sharing requests from multiple sources, or to ensure the data is being shared from your app, and not someone else’s.
Note that for a new Android Studio project, the layout created will be a ConstraintLayout instead of a LinearLayout as shown above. Also please add an id to the layout xml file before initializing it so that it looks as follows:
<?xml version="1.0" encoding="utf-8"?>
<android.support.constraint.ConstraintLayout
    xmlns:android="http://schemas.android.com/apk/res/android"
    xmlns:tools="http://schemas.android.com/tools"
    android:id="@+id/example_activity"
    android:layout_width="match_parent"
    android:layout_height="match_parent"
    tools:context=".MainActivity">


</android.support.constraint.ConstraintLayout>
- And then initialize the layout as a ConstraintLayout instead of a LinearLayout i.e. ConstraintLayout layout = findViewById(R.id.example_activity);
- After this, everything else in the above example will remain the same.
4. Finally build and install the APK into a device or emulator and once your app pops up, you should see the RequestButton displayed!
Also, the first time you tap the button, you'll be presented with a variety of options for which app to use to open the link. Just select Open With -> Bloom -> ALWAYS so that it defaults to opening the Bloom App if it's installed instead of a web browser.
So how can this look and feel in a dating app? Let’s see some examples.
Here’s what the view for editing your own profile could look like:
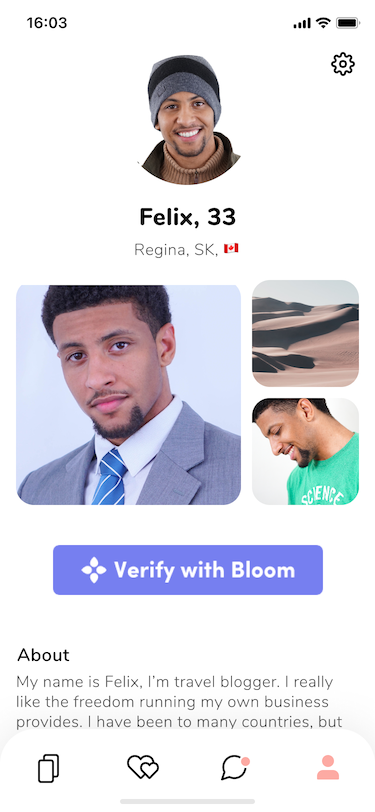
And if “Felix” goes through the process of verifying his ID, that process looks like this.
- Tap “Verify with Bloom”
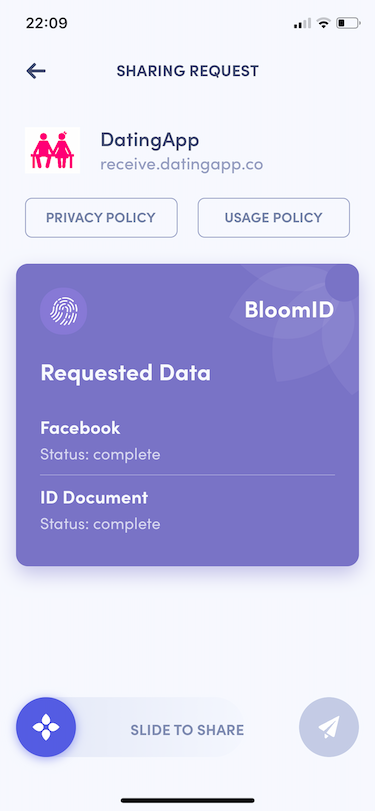
- View and confirm the data sharing request
3. Success!
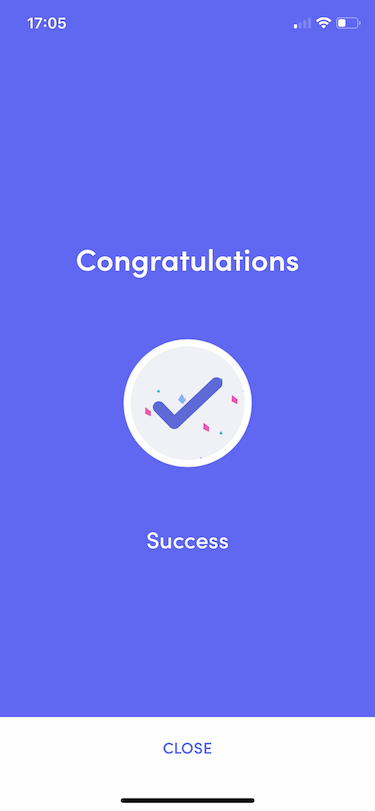
Felix’s view of his settings and profile could now look like this, with the Bloom icon (or another indicator of some kind) showing that he has verified his name is actually Felix.
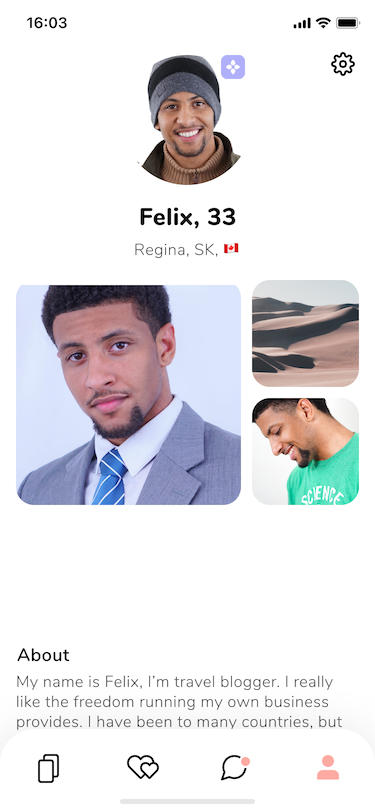
Ta-da! He’s verified his name is actually Felix, we confirmed this server-side using the two Verifiable Credentials provided (the ‘full-name’ subtype from the ‘id-document’ and ‘facebook’), and so now can apply some kind of indicator to his profile to show that.
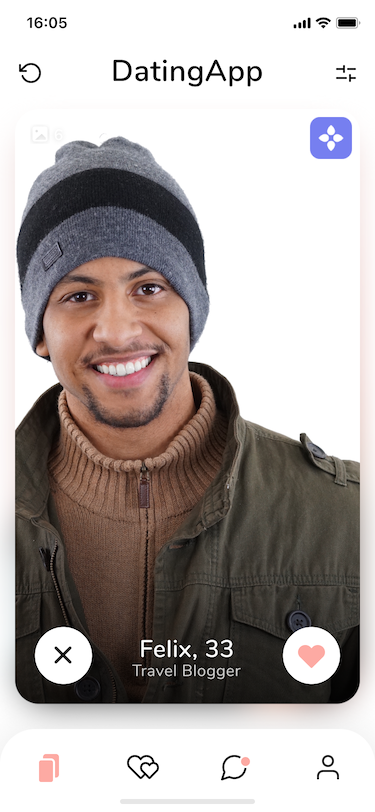
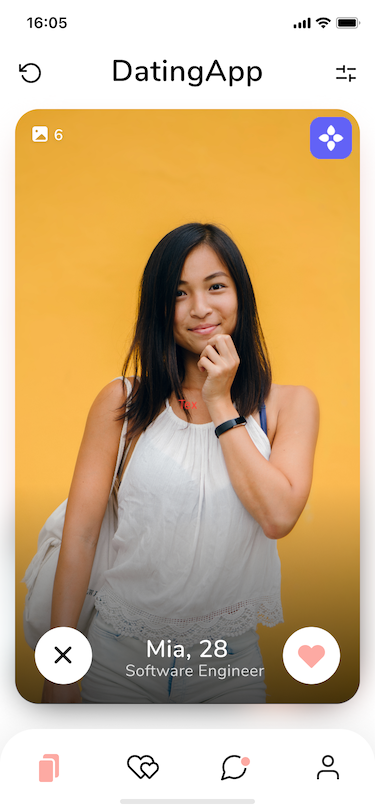
Now, how would this look to other users when viewing profiles of potential matches? We have some examples of that as well.
You could also provide the ability for users to verify their age, their phone number, email address, or implement some computer vision to compare the photo on their ID document to their dating profile photo!
That is just one of the many use cases where you can use Bloom’s open source technology to enhance trust and security within your platform on a user-permissioned basis, while maintaining data security and privacy. Verify the data provided, delete it from your Verify Kit service, and allow your users to connect knowing you have taken at least one concrete step towards making your dating platform safer for all parties.
More Resources:
- Share Kit Documentation
- Share Kit Android GitHub Repository
- Share Kit iOS GitHub Repository
- Verify Kit Documentation
- Verify Kit GitHub Repository
- Bloom Starter GitHub Repository
Bloom: Your Data, Your Credit, Your Privacy
At Bloom, we are giving you the tools to take back control of your data all in one simple app. No more centralized data storage. No more selling off your data to the highest bidder. Bloom enables you to own, control, and protect your data using the latest advancements in blockchain technology.
It’s time to take back control of your data and unlock the power of a secure identity today. Download the Bloom mobile app to build a digital identity, monitor your credit, and get free data breach alerts with Radar!
